 Skip to main content Skip to footer
Winter window replacement is more common than many homeowners realize, and it can still deliver strong results when done correctly. Modern installation methods allow crews to work efficiently while protecting indoor comfort during the process. In fact, colder months can make drafts and insulation problems easier to notice. With the right planning, winter installations can be smooth and effective. In this blog, we’ll explain whether windows can be installed during winter, what conditions matter most, how professionals prevent heat loss during installation, and what homeowners should know to ensure a safe, efficient upgrade in colder weather.
Key Takeaways
- Yes, you can install windows in the winter—professional installers routinely complete projects from December through February, even when outdoor temperatures drop below freezing.
- Installers work one window at a time, so your home is only exposed to cold air for about 15–30 minutes per opening, not hours of whole-house chill.
- Modern cold-weather foams, sealants, and installation techniques are specifically designed to perform reliably in sub-freezing conditions.
- Winter installations often come with better scheduling flexibility, shorter wait times, and off-season discounts from window companies.
Can You Really Install Windows in the Winter?
Yes, you can absolutely install windows in the winter. This is one of the most common questions homeowners worry about when they notice drafts creeping in during the colder months, and the answer is reassuring: professional window installation happens year-round, including the coldest weeks of January and February.
Window companies in colder regions routinely complete winter installations from November through March. These areas would have very short working seasons if cold temperatures alone stopped the job. The reality is that temperature by itself rarely prevents installation. What actually limits work are severe conditions like blizzards, dangerous wind chill, or heavy freezing rain that make exteriors unsafe.
Modern installation techniques and materials have come a long way. Low-temperature polyurethane foams and silicone sealants are specifically formulated to apply, expand, and cure properly in sub-freezing weather. When installers follow manufacturer guidelines and use the right products, winter-installed windows perform just as well as those put in during warmer months.
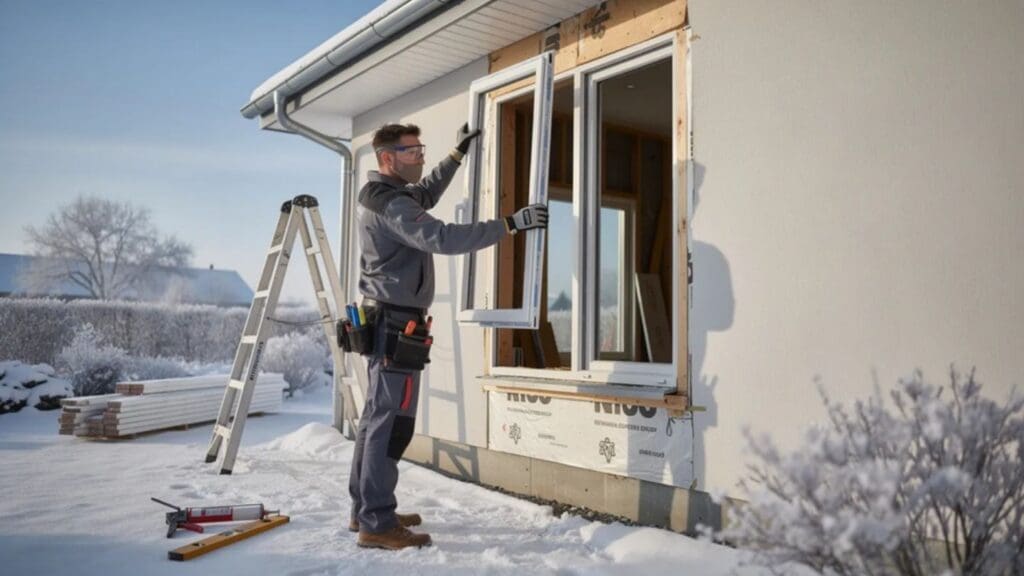
Many homeowners worry that their house will freeze during the process. Here’s the truth: each window opening is typically exposed to cold air for only 15–30 minutes while the crew removes the old unit and sets the new one. That’s a brief, localized chill—not hours of your entire home open to January winds.
Why Winter Can Be a Smart Time for Window Replacement
Winter is often considered the “off-peak” season for window replacement, and that brings several practical benefits that many homeowners don’t realize.
First, there’s improved scheduling flexibility. From April through October, window companies are typically booked solid with projects. In winter months, you’ll often find shorter wait times and an easier path to booking specific dates—including weekends if that works better for your schedule. You get more flexibility when contractors aren’t juggling a packed calendar.
Second, many manufacturers and installers offer discounts and promotions during winter to keep their crews busy. January and February sales, 0% financing offers, and bundled deals on doors and windows are common. If you’re looking to save money, the off-season can work in your favor.
Winter weather also makes problems with your old windows impossible to ignore. Drafty frames, fogged glass, ice buildup on interior panes—these issues are most obvious in December through February. You can pinpoint exactly which units need replacing when the wintry weather exposes every flaw.
Finally, installing new windows in winter means you enjoy the benefits immediately. Lower heating bills, reduced drafts, and better comfort start the same season you make the upgrade, rather than waiting through months of discomfort until spring.
Energy Efficiency Advantages in Cold Weather
Cold conditions around 0°C (32°F) or lower make heat loss, drafts, and condensation much easier to detect. When you can actually feel cold air seeping through a frame or see frost forming on interior glass, you know exactly where your home is losing energy.
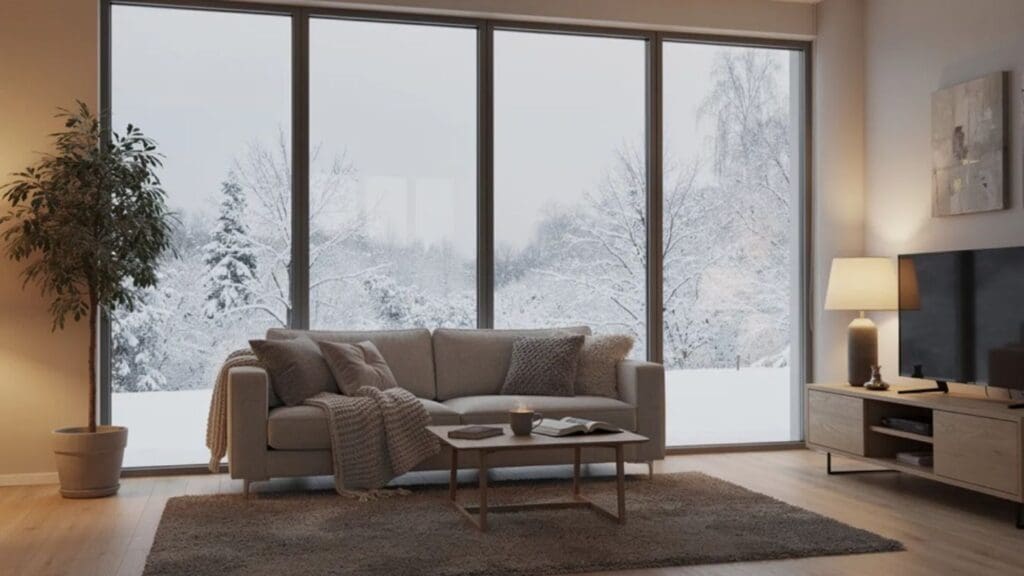
Replacing single-pane or leaky double-pane windows with energy-efficient windows can immediately reduce your heating costs. Quality windows with double or triple glazing, argon or krypton gas fill, and warm-edge spacers are engineered to perform well during January cold snaps. These features keep interior glass surfaces warmer, reduce condensation, and minimize the workload on your heating system.
If you’re seeing broken seals leading to interior frost, ice buildup, or that telltale “fogged” appearance between panes, those are clear signals to replace windows in winter rather than wait. The longer you delay, the more money you spend heating outdoor air.
For example, homeowners upgrading from 1980s-era windows to modern ENERGY STAR-rated units often see a 10–20% reduction in heating bills. That’s real money back in your pocket, starting the same winter you invest in replacement windows.
Weather, Temperature, and Other Winter Installation Challenges
Winter window installation is safe and effective, but it does require more planning around the weather compared to a project in summer or spring. Reputable installers build this into their process.
Common winter obstacles include snow accumulation around the house, icy walkways, shorter daylight hours, and strong winds that make exterior work more challenging. None of these are dealbreakers—they just require preparation and sometimes schedule adjustments.
Professional installers monitor forecasts closely and may shift installation dates to avoid heavy snow or freezing rain if unpredictable weather rolls in. A good company will reschedule rather than push through unsafe conditions. This protects both their crew and your home.
Homeowners should expect a bit more scheduling flexibility in January and February compared with the busy spring season. A storm might bump your project by a day or two. But even with occasional weather delays, winter projects often finish faster overall because contractors have more availability in the slower season.
Temperature Limits and Material Performance
Most standard installation products perform best when air temperatures are above about -10°C (14°F). Below that threshold, many professionals switch to specialty low-temperature foams and sealants designed for cold conditions.
When air temperature or wind chill approaches -20°C (-4°F), most experienced installers will pause or reschedule exterior work. This isn’t just about product performance—it’s also a matter of crew safety and ensuring quality results.
Low-expansion, low-temperature polyurethane foams and silicone sealants are rated by manufacturers for sub-freezing applications. These products remain workable and adhere properly even when it’s cold enough to see your breath. However, very low temperatures do slow curing times. Installers may adjust their techniques, allowing longer cure periods before final trim or keeping cans warm indoors until immediately before use.
| Temperature Range | Installation Guidance |
| Above 0°C (32°F) | Standard products and procedures work normally |
| 0°C to -10°C (32°F to 14°F) | Use cold-weather foams and sealants; slightly longer cure times |
| Below -10°C (14°F) | Specialty materials required; pause work near -20°C (-4°F) windchill |
Snow, Ice, and Site Preparation
Before the crew arrives, homeowners should clear snowbanks and ice at least 1–2 meters (3–6 feet) around exterior windows, and proper planning through how to prepare for a window installation helps the project run smoothly and safely. This gives installers safe access and a stable footing for ladders.
Installers generally are not responsible for snow shoveling or de-icing walkways—that’s a homeowner’s task due to safety and time constraints. Spreading sand or ice melt on paths the morning of installation helps keep everyone safe.
Inside the house, remove window screens, open blinds, and move furniture or radiators that block access to interior sills. Drop cloths protect your floors, but clearing the workspace ahead of time speeds up the job and minimizes disruption.
Safe ladder placement is critical in January and February when roofs, decks, and exterior surfaces may be slick with ice or snow. Professional crews assess conditions carefully, but a little homeowner prep goes a long way.
Winter Window Installation Myths vs. Facts
Many homeowners worry about winter window replacement based on outdated information or exaggerated fears. Let’s address the most common myths head-on.
The reality is that modern vinyl, fiberglass, and aluminum-clad frames are engineered to handle seasonal expansion and contraction. Today’s cold-weather foams and sealants are formulated for reliable performance in sub-freezing temperatures. The key to quality isn’t the month on the calendar—it’s professional installation using appropriate materials and techniques.
Current building standards and ENERGY STAR guidance assume windows will be installed and will perform across all seasons. When installers follow manufacturer specifications, winter installations are just as durable and weather-tight as those done in summer.
Myth: The House Will Be Freezing During Installation
This is probably the biggest concern homeowners have, and it’s understandable. Nobody wants their living room exposed to January winds for hours.
Here’s how it actually works: installers remove and replace windows one opening at a time, usually completing each in about 20–40 minutes. While one window is being worked on, interior doors can be kept closed, and plastic sheeting can be hung to isolate the work area from the rest of the home.
Many crews bring portable fans or small heaters to keep work zones more comfortable without overtaxing your HVAC system. Your main heating stays on normally throughout the project.
Most homeowners who’ve had windows installed in mid-winter report only a brief, localized temperature dip in the room being worked on—not hours of whole-house exposure to cold air. The experience is typically less disruptive than expected.
Myth: Caulking and Foam Don’t Work in the Cold
Standard caulks and foams do have temperature limits, but that’s why cold-weather formulations exist. Specific “low-temp” caulks and expanding foams are labeled for use down to about -10°C (14°F) or even lower.
Professional installers know to keep cartridges and foam cans in a heated vehicle or indoors until immediately before use. This ensures the products apply smoothly and adhere properly.
Only at extreme cold—around -20°C (-4°F) or below—do most manufacturers advise against applying these products. When temperature and product guidelines are followed, seals are durable and weather-tight year-round.
It’s worth noting that curing times are longer in cold conditions, so crews may check joints carefully and allow extra time before completing final trim work.
Myth: Winter-Installed Windows Will Warp or Shift in Summer
Quality windows made from vinyl, fiberglass, composite, and modern wood-clad materials are tested for wide temperature swings—from deep winter lows to summer highs. Manufacturers design these products knowing they’ll experience seasonal cycling year after year.
Professional installers allow for expected expansion and contraction through proper shimming and fastening techniques. The frame needs room to move slightly without binding or creating gaps.
When problems like sticking sashes or air leaks develop, the cause is almost always poor installation, not the season in which the windows were installed. Choosing experienced installers who follow manufacturer specifications and local building codes prevents these issues regardless of when the work is done.
Reputable companies back their work with installation warranties that cover performance across all seasons. If something isn’t right, they’ll make it right.
How Professionals Install Windows in Winter
The basic installation steps are similar year-round, but winter adds extra protection measures and planning. Understanding the process can help you feel more comfortable scheduling a winter project.
A typical workflow includes an in-home consultation, precise measurements, ordering your custom units, the installation day itself, and a final inspection, and understanding the window installation timeline helps set realistic expectations for each step. For an average house, a standard full-day winter project might replace 8–15 windows, depending on size and complexity.
Interior protection with drop cloths and plastic barriers is especially important when there’s snow and slush present. Good crews take this seriously, laying down floor protection and wearing boot covers to keep salt, moisture, and mud off your floors.
The Step-by-Step Winter Process
Crews usually begin with the least weather-exposed side of the house, especially if the wind chill is severe. This strategic approach minimizes how much cold air enters your home during the project.
Here are the key steps for each window:
- Remove the old sash and frame carefully
- Inspect the rough opening for any damage or moisture issues
- Apply flashing and insulation as needed
- Set the new window unit into the opening
- Level, shim, and secure the frame
- Insulate around the frame with low-expansion foam
- Apply exterior sealant and complete interior trim
Only one window—or one room at most—is opened at a time. This limits exposure to cold air and prevents snow from blowing into your house.
Timing varies by window type: expect about 30–60 minutes per standard window, with larger picture windows or bay units taking longer.
Keeping Your Home Comfortable During a Winter Install
Keep your main heating system running normally during the project. This maintains stable temperatures throughout the house and helps the work zone recover quickly after each window is completed.
Close doors to rooms not being worked on. For larger, open-concept spaces, temporary plastic sheeting can help isolate the active work area. Most installers are experienced at minimizing disruption and will suggest the best approach for your home’s layout.
Professional crews wear boot covers and lay down floor protection to keep salt, slush, and mud off interior surfaces. This matters even more in winter when exteriors are messy.
Simple homeowner prep helps things go smoothly:
- Remove curtains and blinds from windows being replaced
- Take down wall decor near the work area
- Cover nearby furniture with sheets or move it back a few feet
- Clear a path from the front door to work areas
Most winter installations are completed in a single day, minimizing disruption to your household routine.
Choosing the Right Company and Products for Winter Installation

The installer’s experience in cold climates matters as much as the window itself, and recognizing common window installation mistakes helps homeowners evaluate whether a company follows reliable procedures and warranty-backed standards. A company that regularly works through winter knows how to handle the unique challenges and has the right materials on hand.
When evaluating window companies, ask specifically about their winter installation procedure and what materials they use in sub-freezing weather. Companies experienced with winter installations will have clear answers and established protocols.
Always verify licensing, insurance, references, and written warranties on both product and labor before signing anything. A solid warranty should cover performance across all seasons.
Select windows rated for your climate zone. For homeowners in northern regions, look for ENERGY STAR Northern Climate Zone ratings that indicate the window is designed for harsh winter conditions.
Using one company for both manufacturing and installation can simplify warranty claims and after-sales service. When something needs attention, you have a single point of contact instead of finger-pointing between different companies.
What to Ask Before Booking a Winter Install
Before committing to a winter window replacement project, get answers to these questions:
- “How often do you install windows in January and February in this area?”
- “What’s your temperature cut-off policy? At what point do you reschedule?”
- “How do you handle snowstorms or last-minute weather changes?”
- “Which foam and sealant brands do you use, and what temperature ranges are they rated for?”
- “Will your crew work one window at a time, and how do you limit indoor heat loss?”
- “What preparation do you need from me before installation day?”
- “What does your installation warranty cover, and for how long?”
If you have specific concerns—pets that need to be contained, young children at home, a home office where you need to take calls—discuss these when scheduling. A good company will work with you to minimize disruption.
Winter Upgrades Without the Wait
Installing windows in the winter is not only possible but often practical when handled by experienced professionals. With cold-weather sealants, room-by-room replacement, and proper planning, homeowners can upgrade comfort without major heat loss. Winter installation can also reduce drafts immediately and improve energy performance right away.
At Advanced Window Products, we provide window installation in Houston that delivers reliable results in every season. We install hurricane windows, all replacement windows, and energy-efficient windows built for long-term comfort and protection. Reach out to us today to plan a smooth winter window upgrade that improves your home immediately.
Frequently Asked Questions
Is there a temperature that’s too cold to install windows?
Most professionals can install windows down to about -10°C (14°F), and sometimes lower with cold-weather materials. When wind chill nears -20°C (-4°F), many crews pause for safety and performance reasons. Temperature limits vary by contractor and sealant type, so confirm beforehand.
Will my energy bills spike during the installation day?
Usually, any added heating cost is minimal. Installers replace one window at a time, typically finishing each opening in 20–40 minutes, so heat loss stays controlled. The small temporary increase is quickly offset by the long-term savings from improved insulation and airtight windows.
Can I stay in the house while my windows are replaced in winter?
Yes, most homeowners stay home during winter installations. Crews work room-by-room, so the rest of the home remains warm and usable. Closing doors to work areas helps reduce drafts. Expect slight temperature changes in active zones, but the disruption is typically minor.
Do I need different windows for winter installation than for summer?
No, the same window products are used year-round. What changes is the installation process, including cold-weather foams and sealants designed to cure properly in lower temperatures. A window installed in winter performs the same as one installed in summer when installed correctly.
How far in advance should I schedule a winter window project?
Schedule your project about 3–6 weeks in advance. This allows time for consultation, accurate measurements, custom ordering (often 2–4 weeks), and planning around winter weather. Winter schedules can be more flexible than peak seasons, but early booking ensures better date options.